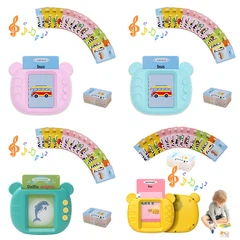
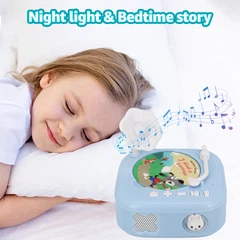
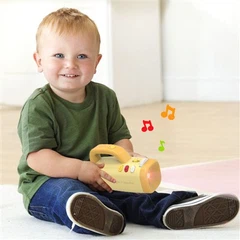
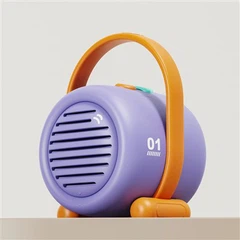

In the world of educational toys, personalization has become a key factor in engaging young minds and enhancing learning experiences. Customizing projector film discs, audio features, and case colors allows parents, educators, and toy designers to create unique, interactive devices that cater to specific themes or educational goals. This comprehensive guide dives deep into the technical aspects of customization, drawing from expert insights to ensure high-quality results. Whether you're looking to build a storytelling projector for kids or an interactive learning tool, understanding these elements can transform a standard projector into a tailored masterpiece. By following these steps, you'll achieve stunning projection effects, immersive audio, and aesthetically pleasing designs that stand out in any playroom or classroom setting.
Preparing High-Definition Images for Optimal Film Disc Customization
The foundation of any customized projector film disc lies in the quality of the images you provide. To achieve crystal-clear projections that captivate children's attention, it's essential to start with very high-definition visuals. Engineers in the field emphasize that the resolution should be at least 3000 by 3000 pixels, with the capability to support up to 6000 by 6000 pixels in AI-generated formats. This high standard ensures that every detail, from intricate patterns to vibrant colors, translates beautifully onto the disc and projects without any loss of clarity.
Creating the outline for your artwork in advance is a crucial preparatory step. This involves sketching or digitally outlining the key elements of your image to fit perfectly within the disc's circular slot. Opting for square artwork is highly recommended because it allows for easy centering when placed in the round format of the disc. Imagine designing a series of educational scenes, like animals in their habitats or historical figures in action-ensuring the composition is square means the entire image will be visible and balanced during projection, avoiding any awkward cropping or distortion.


One of the most effective ways to generate these high-resolution images is through advanced AI drawing software. Tools like Google's Imagen 3 stand out for their ability to produce stunning, detailed visuals with minimal effort. For instance, if you're customizing a disc focused on space exploration, you could input prompts for galaxies, planets, and astronauts, and the AI would deliver professional-grade images that meet or exceed the required resolutions. This not only saves time but also opens up endless creative possibilities, making it accessible even for those without professional graphic design skills. By leveraging such technology, you can easily overcome common challenges like low-quality sourcing and ensure your projector discs deliver an immersive, high-definition experience that educates and entertains.
Once your images are ready, visualize how they will appear on the disc. Completed film artwork should showcase a seamless integration, where each image aligns perfectly with the disc's mechanics. This step involves reviewing mockups or digital previews to confirm that the artwork maintains its integrity. For example, if your theme is ocean life, the images of sea creatures should pop with vivid colors and sharp edges, enhancing the storytelling aspect when projected onto a wall or ceiling. Paying attention to these details early on prevents revisions later and guarantees a polished final product that aligns with your vision for an engaging educational tool.
Organizing and Preparing Audio Files for Enhanced Projector Functionality
Audio customization is another pivotal aspect of creating a fully immersive projector experience, particularly for educational toys aimed at children. The process begins with selecting the right file formats and ensuring high-quality sound. Accepted formats include WAV and MP3, with a strong preference for higher sampling rates to maintain audio fidelity. A minimum of 128 kbps is advised, but aiming higher-such as 320 kbps or lossless WAV-will result in richer, more detailed soundscapes that complement the visual projections effectively.
To gauge the quality of your music files, consider their duration and size. If a one-minute track is under 1 MB, it might indicate a lower sampling rate, which could lead to muffled or distorted playback. Upgrading to higher quality ensures that every note, voiceover, or sound effect comes through clearly, making the projector not just a visual aid but a multisensory learning device. For educational content, this means clearer narrations of stories, more impactful sound effects for science demonstrations, or melodic tunes that reinforce musical education.


Grouping your music files in advance is essential for smooth integration with the projector's disc system. Adopt a structured naming convention, such as numbering them 1 through 5 or labeling them A through E, to correspond with the disc's slots. Each parent folder should contain exactly eight music files, aligning with the eight images typically featured on a single disc. This organization allows the projector to play the appropriate audio track in sync with each projected image, creating a cohesive narrative flow.
For added personalization, consider incorporating instructional audio for each disc. Upon insertion, this introductory track can play first, orienting the user-such as informing children which disc they've selected and what theme it covers. This feature is particularly useful in multi-disc sets, where kids might switch between topics like animals, vehicles, or fairy tales. It adds an element of guidance, making the toy more user-friendly and educational by building anticipation and context before diving into the main content.
If your projector needs to support multiple languages, prepare separate parent folders for each language version. This setup enables seamless switching, ensuring the toy is accessible to a diverse audience. The "M" button on the top of the projector can even be customized as a language toggle, allowing users to switch between English, Spanish, or other languages with a simple press. This multilingual capability broadens the educational reach, making the projector ideal for bilingual households or international markets, where cultural inclusivity enhances the learning value.
Customizing Colors for Projector Cases and Silicone Components
The aesthetic appeal of your projector can significantly influence its attractiveness to children and its integration into various environments. Customizing the case colors and silicone parts involves understanding the mold structure and selecting hues that align with your theme or branding. The entire outer shell, which includes the front panel, is molded as a single piece and can be unified in one color. This creates a sleek, cohesive look that can be tailored to match educational motifs, such as bright primaries for young learners or pastel shades for calming bedtime stories.
Next, the disc holder and side knob form another set of components that share a mold and can be customized to a single color. Coordinating these with the outer shell-or contrasting them for visual interest-adds depth to the design. For instance, a blue shell with yellow accents on the holder and knob could evoke an underwater adventure theme, drawing kids in and encouraging repeated use.
The silicone parts offer even more flexibility, allowing for up to two colors in their customization. These soft, durable elements often include grips or protective covers, and dual-color options enable creative combinations that enhance both functionality and style. Referencing visual guides during this process helps in envisioning the final assembly, ensuring that the colors not only look good individually but also harmonize as a whole.
To select the perfect shades, utilize reliable color matching systems like Pantone. Online tools provide extensive palettes, allowing you to choose from thousands of options with precision. Whether you're aiming for vibrant reds to stimulate energy or soothing greens for nature-themed projections, Pantone ensures consistency across manufacturing batches. This step is vital for maintaining brand integrity or thematic accuracy in educational toys, where color psychology plays a role in engagement-warm tones might encourage creativity, while cool ones promote focus.
Integrating these customizations requires careful planning to avoid mismatches. Start by sketching your color scheme and testing it against the projector's overall design. This ensures that the final product is not only functional but also visually appealing, making it a standout item in the competitive market of educational toys. By investing time in color selection, you elevate the projector from a simple device to a personalized artifact that resonates with users on an emotional level.


Best Practices for Integrating Customizations in Projector Design
Bringing together film discs, audio, and case colors demands a holistic approach to ensure everything works in harmony. Begin by aligning your image themes with audio content-for example, pairing wildlife images with corresponding animal sounds or narrations. This synchronization amplifies the educational impact, helping children associate visuals with auditory cues for better retention.
Testing is key throughout the process. Once custom elements are prepared, simulate the projector's operation to check for any issues, such as audio lag or color clashes. High-resolution images should project sharply, audio should play without distortion, and colors should remain true under various lighting conditions. Iterative adjustments based on these tests refine the product, ensuring it meets high standards of quality and user satisfaction.
For those venturing into multilingual or multi-themed projectors, organize your files meticulously to prevent confusion during assembly. Labeling folders clearly and maintaining backups of all assets safeguards against data loss, allowing for smooth scaling if you decide to produce multiple units.
Ultimately, these customizations empower creators to craft projectors that are more than toys-they become tools for inspiration and learning. By adhering to these guidelines, you'll produce devices that delight children while providing lasting educational value.
Elevating Educational Toys Through Personalization
Customizing projector film discs, audio, and case colors opens up a realm of possibilities for educational toy innovation. From high-definition visuals that spark imagination to immersive sounds that reinforce lessons, and vibrant cases that invite play, each element contributes to a richer experience. As technology like AI continues to simplify creation, the barriers to personalization diminish, allowing more people to design tools that cater to specific needs. Whether for home use, classrooms, or gifts, a well-customized projector stands as a testament to thoughtful design, blending fun with functionality in ways that captivate young learners for years to come.