




How to Test a Kids Story Projector Sample: 12 Checks
A practical B2B test method for reviewing focus, color, sound, controls, power, durability, packaging and claim accuracy before pilot production.
A reliable kids story projector test uses repeatable room conditions, named evidence and a stable sample revision instead of relying on one impressive dark-room demonstration. Contact Joy on WhatsApp: +86 13691793052 · E-mail: xdt05@dtdianzi.com.
Test 1: document the exact sample before measuring
Begin with the model revision, optical module, firmware version, content set, power state and enclosure status. Photograph the front, top, sides and rear. Without this record, later results cannot be linked to a stable build.
Use a simple sample sheet and label every file with the same revision code. A kids projector sample test is only useful when another team can identify what was evaluated and reproduce the setup.
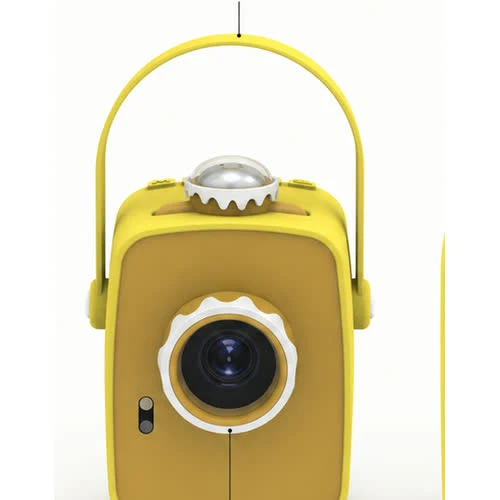
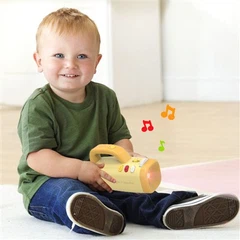
Front profile for a custom kids story projector
The centered lens, rounded yellow enclosure, raised carry handle and top control ring create the product's recognizable "big eye" expression. Buyers should use this clean view to approve proportion, color separation and lens alignment before packaging artwork is frozen.
Test 2: define the room and projection surface
Record ambient light, wall color, wall texture, projector height, throw distance and image size. These variables change perceived brightness, contrast and focus. Comparing samples in different rooms produces misleading conclusions.
Mark the projector and wall positions with tape, then keep them fixed for the full test. Photograph the room before switching off lights so the setup can be rebuilt during the next prototype round.
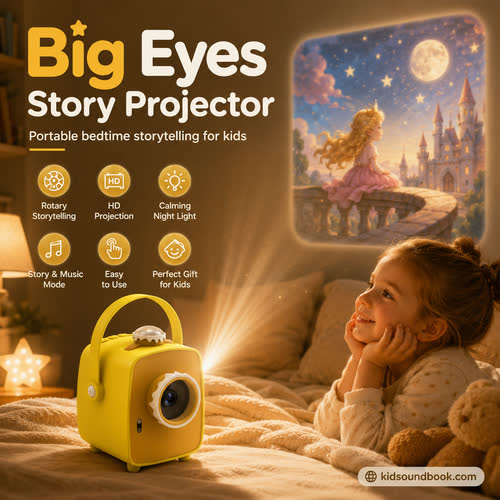
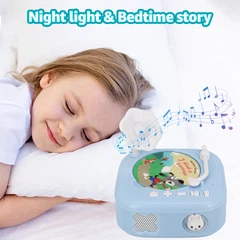
Bedtime projection as a real use condition
A dim bedroom changes how projected color, focus and sound are perceived. This scene is useful for discussing throw distance, wall tone, control visibility and whether the device can be positioned without encouraging a child to look into the lens.
Test 3: check center and corner focus
Display an image with fine lines or readable characters. Focus the center, then inspect all four corners without moving the unit. A sample can look sharp in the middle while edges remain soft because of lens quality or alignment.
Capture close photographs from the same camera position. If one edge is consistently worse, rotate or reseat the sample to separate surface angle from internal optical alignment. Record the correction needed rather than writing "image unclear."
Test 4: compare color and dark detail
Use several familiar images containing skin tones, saturated colors, pale gradients and dark scenes. Look for color casts, clipped highlights, muddy shadows and uneven illumination. Do not judge color from one promotional picture.
Keep camera exposure fixed when documenting alternatives. The purpose is not to claim cinema performance; it is to confirm that story art remains readable and consistent under the intended use condition.

Portable family story projector routine
The handle and compact body suggest movement between rooms, but portability must be validated with weight, cable storage, drop resistance and adult setup steps. A family scene helps buyers define who carries, places and operates the finished product.
Test 5: verify throw distance and usable image size
Move the projector through the practical placement range and record where the image can be focused. Measure image width at each position. This exposes whether a bedroom or play-corner concept works in the available space.
Check how placement affects cable routing, sound direction and control access. A large image is not automatically better if focus becomes uneven or the device must sit where a child can easily disturb it.

Gift-ready packaging concept for projector toys
Packaging must protect the lens, handle, controls and any story media while explaining the first-use sequence. The pictured concept supports discussion of tray retention, accessory counting and multilingual instructions; final claims must match the approved hardware.
Test 6: review control discovery in low light
Ask a person who has not seen the prototype to power it on, focus the image, select content, adjust volume and stop playback. Observe which controls are confused and whether the operator leans toward the lens.
Repeat with the handle raised and lowered. Note icon visibility, tactile differences, click force and accidental activation. These findings should feed the top-panel design before tooling.
Test 7: test narration over operating noise
Play spoken content at low, medium and high volume while the optical system is operating. Listen from the intended adult and child positions. Record fan noise, enclosure vibration, buzzing and loss of consonant clarity.
Use the same narration clip for each revision. If the speaker sounds acceptable on the bench but poor in the housing, review grille area, cavity volume, mounting and internal obstruction before changing the audio file.

Component access and service planning
An exploded concept helps engineering teams discuss enclosure halves, optical path, PCB position, speaker clearance and battery access. It is not a production drawing, so every internal part, fastening method and electrical specification still needs confirmation during development.
Test 8: challenge the content pathway
Insert or select content correctly, incorrectly and repeatedly. Remove power during playback, restart the device and confirm where the story resumes. If a card, disc or library is planned, test recognition and error feedback.
Write expected behavior for each action before the test. This turns vague software comments into an OEM projector validation checklist that firmware and customer-service teams can share.
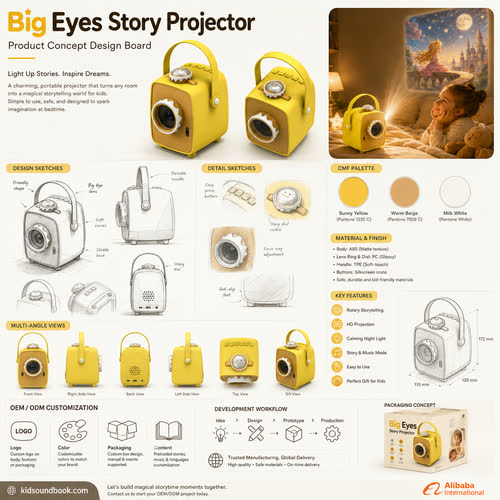
Industrial design review for OEM development
A design board brings silhouette, color direction, handle geometry and control placement into one review. Buyers can mark fixed brand cues separately from negotiable engineering details, reducing the risk that a late module change alters the character unexpectedly.
Test 9: measure session power and surface temperature
Run the longest intended session with normal audio and projection. Record starting power state, operating time, charging behavior and temperatures at accessible surfaces and internal hotspots identified by engineering.
Do not publish runtime or thermal claims from concept art. Use the final battery, optical engine, enclosure and firmware because each can change consumption and heat.
Test 10: exercise the handle and enclosure
Raise, lower and carry the complete unit repeatedly. Check hinge looseness, stop position, pinch clearance and stress marks. Inspect the lens ring, feet, seams and control panel after normal handling and controlled drops defined by the project.
Photograph defects immediately and link them to the cycle count. A visible handle is both a brand feature and a structural component, so appearance and durability criteria belong in the same report.

Calm projection experience without a handheld screen
Warm lighting and a simple projected story illustrate the intended emotional outcome rather than a verified brightness level. The scene helps teams discuss ambient light, image size, session duration and audio pacing before they choose an optical or content architecture.
Test 11: run a first-use packaging trial
Give a packed sample and draft instructions to a new operator. Ask them to unbox, identify included items, position the projector and start a story without coaching. Record hesitation, missing information and accessory confusion.
Inspect the product after repacking and transit simulation. Lens scuffs, handle pressure or loose media may require tray changes even when the outer carton looks undamaged.

Shared storytelling instead of passive viewing
Projection can become a social prompt when an adult pauses, asks questions and changes the story pace. Product teams should decide whether interaction comes from physical controls, removable media, narrated tracks or a companion experience, then test that exact route.
Test 12: audit every claim against evidence
List each proposed statement about projection, sound, portability, content, power and safety. Beside it, name the supporting specification or test. Remove or qualify anything that the current build cannot prove.
This audit should happen again after hardware or firmware changes. It protects the buyer, prevents outdated packaging and gives distributors a reliable answer when customers compare products.
Use defect language that engineers can act on
Replace "bad focus" with a location, distance and observable result. Replace "button difficult" with operating force, user action and failure mode. Specific evidence shortens the correction loop.
Include photographs, short videos and the exact test sequence. Different teams can then distinguish design defects, assembly variation and setup errors instead of debating impressions.

Gift set presentation and accessory control
A gift presentation should make every included item visible and easy to count. Buyers can use this image to plan inserts, story discs or cards, charging accessories and printed guides without assuming that every pictured item belongs to the final commercial set.
Create a golden setup as well as a golden sample
A physical golden sample is useful, but projection results also depend on room and content. Preserve a reference test file, wall target, distances, lighting condition and approved settings.
When production units are checked against the same setup, image and audio changes become easier to detect. This is especially important when suppliers substitute optical or electronic parts.

Controls that can be found in low light
The top ring, handle joints and front lens surround are natural touch points. Prototype reviews should check operating force, icon readability, accidental activation, pinch clearance and focus adjustment while the unit is placed at its intended height.
Convert pilot findings into production controls
Pilot builds should repeat the critical optical, audio, control, handle and packaging checks after normal assembly. Track recurring issues and update work instructions, fixtures and inspection photos.
The final control plan should identify which checks happen during incoming inspection, assembly, functional test and final audit. Evidence collected this way supports future variants without pretending every version is identical.
Score severity before choosing the next action
Not every observation should stop development. Classify issues by user impact, safety relevance, claim risk, frequency and difficulty of correction. A cosmetic mark hidden inside the battery area is different from a focus defect visible in every story. A confusing icon may be corrected in artwork, while a control position trapped by the handle may require mechanical change.
Use a simple severity and occurrence scale, then agree which issues block the next sample stage. This prevents loud opinions from outranking evidence and helps teams spend prototype time on the failures that matter most.
Separate variation from a design problem
One poor unit does not reveal whether the root cause is design, material, assembly or handling. Test several samples from the same build where possible and compare the same checkpoints. If a defect appears at different levels, inspect tolerances, fixtures and assembly sequence; if every unit fails in the same way, review the underlying design.
Keep failed parts and photographs with the report. Replacing them too quickly can erase clues such as stress marks, loose fasteners or cable pressure. A disciplined teardown should follow a documented external test so the original symptom is preserved.
Verify corrections instead of accepting explanations
When a supplier reports that an issue is solved, repeat the original test with the revised sample. Use the same room, content file, distance, volume and power condition. Then run a nearby challenge test to make sure the correction has not moved the problem elsewhere.
For example, tightening an optical mount may improve corner focus but increase assembly stress; changing speaker clearance may remove buzzing but shift the center of gravity. Verification closes the loop only when the observed failure is gone and critical neighboring functions remain stable.
Use a concise report structure
For each check, record the purpose, equipment, setup, procedure, expected result, observed result, severity, owner and retest date. Attach photographs and short clips beside the relevant entry instead of placing all media in an unlabelled folder. A reviewer should be able to understand the failure without attending the original session.
End the report with a decision table: accepted, accepted with monitoring, correction required or blocked pending information. State which sample stage can begin and which claims remain prohibited. This keeps commercial schedules visible without converting uncertainty into an unsupported promise.
Plan retesting before the sample leaves the room
Agree on the exact evidence required to close each issue while the setup is still available. If a correction needs new firmware, save the test content and operating sequence. If it needs mechanical parts, preserve the failed component and measurement points. If it affects packaging, keep the damaged insert and photograph the packed orientation.
Retesting should confirm both the original failure and adjacent functions that may have changed. A focused correction cycle is faster than a broad demonstration because everyone knows what success looks like.
Make the next sample answer fewer, better questions
A useful validation report names the setup, expected behavior, observed result and correction owner for every issue. When optics, audio, firmware, mechanics and packaging share the same evidence, prototype rounds become easier to compare and pilot production starts with fewer hidden assumptions.
For additional category context, read our 2026 guide to kids story projectors. Joy shares visual product-development updates for buyers reviewing new concepts and samples.
FAQ
What is the minimum optical test setup?
Record room light, wall color and texture, throw distance, image size, sample revision and test file. Keep those conditions fixed when comparing prototypes.
Should brightness or resolution claims be copied from a module supplier?
No. Public claims should be based on the selected production-intent system and verified under a documented method appropriate to the product.
How do we test corner focus?
Focus the center using a line or text chart, inspect all four corners without moving the unit, and photograph each area from a fixed camera position.
When is a sample ready for pilot production?
When critical appearance, optical, audio, control, power, durability, packaging and claim checks have defined acceptance criteria and responsible owners.
Discuss your projector-toy brief directly with Joy: WhatsApp +86 13691793052 · E-mail: xdt05@dtdianzi.com.